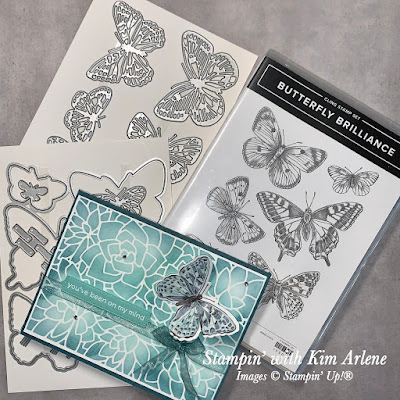
Hi there, friends! Welcome to the March edition of the West Coast Creators Blog Hop! This month we are focusing on butterflies! We have a beautiful new time-limited collection that is now available to customers, called Butterfly Brilliance. My package arrived just today, so I haven't had much time to play with it, but let me tell you--it's gorgeous!! I love it... and I'm not really much of a butterfly person!
I demonstrated how to make the background of this card at our last team meeting. I used Blending Brushes, and a stencil made from the Potted Succulents large die. I cut it from a 5-3/8" x 4" piece of Thick Basic White cardstock. I used a "two for one" method that I saw on Robin Daus' blog. Let me explain: I used Post-it Tape to hold the resulting stencil in place over a 5-3/8" x 4" Basic White piece of cardstock (over one of our grid sheets). I applied inks (Balmy Blue, Coastal Cabana, Bermuda Bay, and Pretty Peacock) with our Blending Brushes, starting with the lightest colour and getting darker each time toward the outer edge of each flower. You need to remember to lift the Post-it Tape when you get to the corners (one corner at a time), and get the ink right to the edge of the stencil. Once the corner is done, carefully put the tape back to hold the stencil in place.
After the colouring is finished, remove the tape from all corners. Both of the white cardstock pieces are beautifully coloured, and you can make two cards--one from the stencil itself, and one from the lower piece (which is what I used for the card below)! Pretty awesome technique, hey??
The rest of the card was very quick to complete. I used some of our Sheer Pool Party ribbon, but it was way too light to show on the card. I used the brush end of the light Pretty Peacock Stampin' Blends to colour a 20" piece of ribbon, and it matched beautifully! I tied it in a bow around the inked card front. This was adhered to a 5-1/2" x 8-1/2" (scored at 4-1/4") card base of Pretty Peacock cardstock.
I heat embossed the sentiment (from the Simply Succulents stamp set) on Coastal Cabana, cut it with one of the label dies from Potted Succulents, and attached it to the card with Dimensionals.
The butterfly is from the Bijou Butterfly Designer Series Paper (DSP). Now here is a stroke of brilliance (pun intended!)--the Brilliant Wings die will cut six butterflies from the DSP all at once!! Easy Peasy!!! I ran a line of glue on the back of the butterfly body only, adhered it to the card, and folded the wings up a bit. Three Basic Rhinestone Jewels were added to the card.
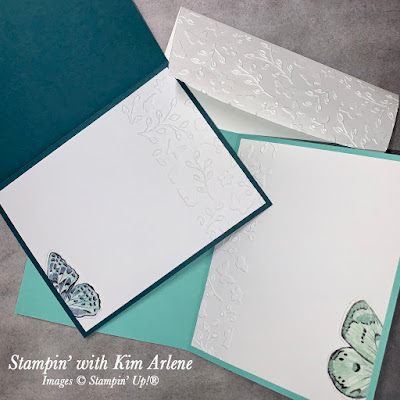
I embossed a piece of Basic White for the inside of the card with one of the Meadow Moments embossing folders. I also embossed the flap of the envelope.
After the six butterflies are cut from the sheet of 6" x 6" DSP, there are a few part butterflies left. You can use the die to cut those out, as well, and they are great for adding to the inside of the card.
So what about the stencil itself? Why, I'm so glad that you asked... 😉 I embossed a 4" x 5-3/8" Basic White piece with the Subtle 3D embossing folder, and glued the stencil to it (with a fine line of glue around the edge of the diecut).
A 12" length of the Pretty Peacock/Old Olive Reversible Ribbon was tied into a knot around the card (the Pretty Peacock side is showing), and then the card front was glued to an 8-1/2" x 5-1/2" (scored at 4-1/4") Coastal Cabana card base.
The sentiment was heat embossed and diecut from another Potted Succulents die, and added to the card with Dimensionals. A butterfly cut from the DSP was glued to the card front, and I added three rhinestones.
Thank you very much for visiting my blog! Please leave a comment below, if you have time. Then be sure to visit the other blogs--there are some gorgeous cards to see!!
❤️ Kim
Product List


WOW!!! The details and the attention to every aspect of the card. From the envelope to the inside of the card! Stunning!
ReplyDeleteThanks very much, Marika!!
Deleteboth these cards are gorgeous! I love that ribbon coloured with Pretty Peacock!
ReplyDeleteThanks, Gill! That is one of my favourite ribbons!! It's nice to be able to have it in a few different colours!
DeleteI love your card and appreciated all the detailed instructions! I have to try brushing with a stencil and changing the colour of ribbon.
ReplyDeleteAw, thanks so much, Shanda! The stencil is a fun, easy technique, and it's great to be able to end up with pieces for TWO cards!
Delete