Monday, December 27, 2021

Color & Contour Thank You Card


Thank you for visiting my blog! And thanks for voting, so my card placed third in Kylie Bertucci's December International Blog Highlights!! Yay! I get to participate in Kylie's Top Ten Winners Hop again. It is an honour to be part of a group of tremendously talented designers from all over the world. If you haven't seen my "Top Ten" card, it is posted at the bottom of this blog entry.


  1. Cut the following layers:
    • Polished Pink: 8-1/2" x 5-1/2", scored at 4-1/4"
    • Pear Pizzazz: 4" x 5-3/8"--die cut with largest Scalloped Contours die
    • Shimmery White Cardstock: 3-1/2" x 5"
    • Basic White cardstock: 2-1/4" x 1-3/4"
  2. Stamp flowers and leaves with Versamark on Shimmery White piece. Add black embossing powder, and set with heat tool. 
  3. Add texture  to background with stamped-off Balmy Blue. Use a Water Painter and  Polished Pink and Pear Pizzazz ink pads (squeeze the ink pad to get ink on the inside of the lid) to paint the flowers and leaves. Use stamped-off Balmy Blue to add texture to the background. Colour the background using a Blending Brush and adding Balmy Blue ink. Adhere to scalloped Pear Pizzazz piece.
  4. Stamp sentiment in Memento; cut with Potted Succulents die; adhere to card front with Mini Dimensionals.
  5. Colour a 16" piece of ribbon with Granny Apple Green Stampin' Blends, thread through scallops, and tie in a bow off to the left side. Adhere to card base with Dimensionals.
  6. Add three Rhinestone Basic Jewels to finish card.


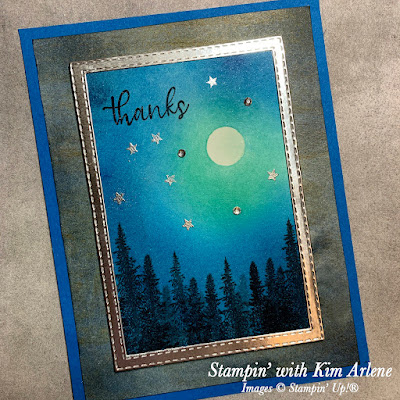
This is the card I submitted in Kylie's contest. You can find the directions to make it here in my December 6 blog post: https://stampinwithkimarlene.blogspot.com/2021/12/mountain-air-thank-you-card.html


Thanks for taking the time to visit my blog--I'd love to hear from you! If you have a moment, please leave a comment below. Then be sure to hop over to all of the Top Ten Winners' blogs! You'll see some amazing creations!

❤️ Kim

If you live in Canada and don't have a Stampin' Up! demonstrator, I'd love to be your demonstrator! Contact me, or click on the product links above. 

Thank you so much for leaving a comment! I'd love to hear from you!


Product List

Tuesday, December 14, 2021

West Coast Creators Blog Hop - Whimsical Trees Gift Card Holder

Welcome to the December West Coast Creators Blog Hop!! This month we are featuring gift card holders and gift packaging. Since Christmas is right around the corner, I hope you will find this useful! My card is a variation of a gift card holder I made on November 29 (which you can find here). It's pretty quick to make, especially if you have some Designer Series Paper (DSP) that you like! Unfortunately, the Whimsy & Wonder DSP is no longer available, but you can make the same gift card holder with any DSP--Christmas or non-Christmas. The Whimsical Trees stamp set is retiring on January 3rd, and is only available while supplies last!!

  1. Cut the following layers:
    • Polished Pink: 9-3/4" x 5", scored at 3-1/4" and 6-1/2"; 4-1/4" x 5" (card base)
    • Whimsy & Wonder Designer Series Paper (DSP): 3-3/16" x 4-5/8", 3-1/4" x 2" (ornaments); 3-1/4" x 4" (stripe)
    • Silver Foil Specialty Paper: 3-1/2" x 5"
    • Basic White cardstock: 3-1/4" x 4"; 2-1/2" x 1" (for sentiment)
  2. Wrap 12" length of ribbon around larger piece of ornament DSP and tie in a knot. Cut silver frame using second and third largest rectangles; glue to DSP. 
  3. Make Z-fold with scored piece of Polished Pink cardstock, having "mountain" fold at left, and "valley" fold at right. Adhere card front to panel on left.
  4. Stamp sentiment in Polished Pink; cut with Seasonal Labels die; adhere to card front with Mini Dimensionals.
  5. Cut striped DSP and Basic White with largest die; use same die to cut the bottom part of the ornament DSP, and then trim the top with the long side of the second largest die. Adhere to striped DSP at bottom and sides only, making a pocket for the gift card. Glue to centre panel.
  6. Stamp the sentiment (full strength) and holly (stamped-off) with Polished Pink; adhere to right hand panel.
  7. Stamp holly along the edges of 4-1/4" x 5-1/2" Polished Pink cardstock with stamped-off Polished Pink. Glue back of right-hand panel to card base, making bottom edges of Z-fold even with bottom of card base, and equal borders at right and left.
  8. Add three Rhinestone Basic Jewels to finish card.

Thanks for visiting my blog! If you have a moment, please leave a comment below. Then be sure to check out the rest of our very talented West Coast Creators' blogs to see their gorgeous creations!

❤️ Kim

You are invited to the Inlinkz link party!

Click here to enter
Product List

If you live in Canada and don't have a Stampin' Up! demonstrator, I'd love to be your demonstrator! Contact me, or click on the product links above. 

Thank you so much for leaving a comment! I'd love to hear from you!

Monday, December 6, 2021

Mountain Air Thank You Card


Hello! Thank you so much for visiting my blog! I made this card for Kylie Bertucci's December International Blog Highlights contest. I hope you like it, and will vote for mePlease click on the button below to go to Kylie's blog, and vote by clicking on the top right corner of the thumbnail of my card (#4), until you see the heart turn red. Thank you so much for your support!!


  1. Cut the following layers:
    • Pacific Point cardstock: 8-1/2" x 5-1/2", scored at 4-1/4"
    • In Good Taste Designer Series Paper (DSP): 4" x 5-1/4" (wood grain)
    • Silver Foil Specialty Paper: 3-1/4" x 4-1/2"
    • Shimmery White cardstock: 2-7/8" x 4-1/4"
    • Basic White: 4" x 5-1/4" (for inside)
  2. Use Blending Brushes to add some Misty Moonlight ink to the woodgrain DSP. Adhere the DSP to card base with Seal.
  3. Cut a frame from the silver foil, using the third and fourth largest Stitched Rectangles Dies. 
  4. Cut a 1/2" circle from the sticky part of a Post-it note with a punch, or the die from Inspiring Canopy Dies; place it on the Shimmery White piece to use as a mask to make the moon.
  5. Apply ink to the Shimmery White piece with Blending Brushes, starting around the Post-it circle, and adding colour in overlapping rings toward the outer edge. Start with Bermuda Bay, then Pacific Point, and finish with Misty Moonlight. Remove the Post-it circle, and apply a little Pool Party ink to the moon.
  6. Ink one of the stars from Sweet Little Stockings with Versamark, stamp several stars, add silver embossing powder, and set with a heat tool.
  7. Stamp sentiment (from Simply Succulents) in Tuxedo Black Memento, and stamp several trees from Mountain Air, stamping off some of them to represent trees in the background.
  8. Glue silver frame to Shimmery White piece with Seal. Adhere to card base using Dimensionals. 
  9. Add three Rhinestone Basic Jewels. 

Thanks so much for stopping by--and for voting!!! If you like my card, please click here--then remember to click on the top right corner of the thumbnail of my card (#4) until the heart turns red--that way you know that your vote is registered:

If you live in Canada and do not have a Stampin' Up! demonstrator, 
I would love to be your demonstrator! Shop here! 😊


Thank you very much for visiting my blog,
and for your support!! 😊

❤️ Kim


Product List
Pool Party Classic Stampin' Pad
[126982]
$8.50
Bermuda Bay Classic Stampin' Pad
[131171]
$8.50

Waves of Inspiration/Oceanfront Fun-Fold Thank You Card

I like this type of fun-fold card--it's unique! Hello, and welcome to my blog! Thanks for stopping by! First of all , this card is not a...