Hello, and thanks for stopping by! And thank you so much for voting for my card--it placed second in Kylie Bertucci's January International Blog Highlights competition!! Now I get to participate in Kylie's Top Ten Winners Hop! I am so honoured to be part of a group of tremendously talented designers from all around the world. If you haven't seen my "Top Ten" card, it is posted at the bottom of this blog entry.
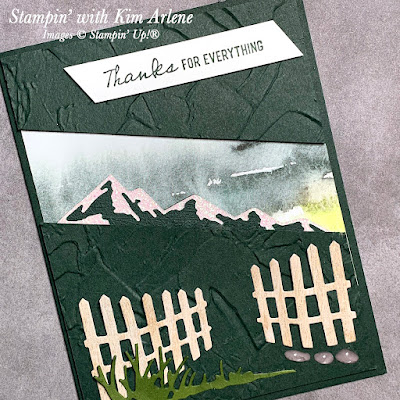
Well, this card was a total mystery to me! 😉 I created this during a team Zoom meeting--it was a Mystery Stamping session. We were given measurements of cardstock and Designer Series Paper (DSP) ahead of time, and told to die cut, stamp, or punch 3 to 5 coordinating images. In the meeting we were given directions to emboss, cut, and assemble the card. These sessions are often hilarious, as sometimes we find our listening skills aren't quite as good as we would like them to be (um... guilty!! 🙄), and our cards can look quite different from the others. It's a lot of fun!!
I decided to use my favourite new suite, New Horizons. Besides a stamp set and dies, the suite has the most gorgeous New Horizons watercoloured DSP, a Cotton Ribbon Combo Pack, and Pebbles Enamel Shapes. I am actually quite happy with how my card turned out (even though I had to improvise a bit with the directions to make my diecut elements work for the card)! But this time my "alternative" directions were deliberate. 😂 Honestly!!
- Cut the following layers:
- Evening Evergreen cardstock: 8-1/2" x 5-1/2", scored at 4-1/4"; 4" x 4" (emboss with Painted Texture 3D embossing folder); 4-1/4" x 1-1/2" (die cut mountains)
- Old Olive cardstock: 3" x 1-1/2" (die cut grass)
- Basic White cardstock: 3-1/2" x 1/2" (for sentiment)
- New Horizons DSP: 4" x 4"
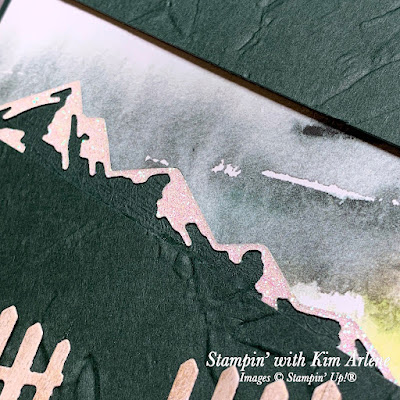
- Supple Shimmer Specialty Paper (white iridescent): 3-1/2" x 1" (die cut snow)
- In Good Taste DSP (light woodgrain): 4" x 2" (die cut fence pieces)
- Adhere the DSP to the card base, leaving 1/8" margins from the top and sides.
- Cut the embossed Evening Evergreen layer at an angle, 1" down from the left side, and 2" down from the right side. Adhere the top part over the DSP with Dimensionals.
- Attach the snow over the mountains with Seal or Multipurpose Liquid Glue, then glue to the back of the angled embossed piece. Attach to card front about 1/8" from the bottom and sides, using Dimensionals.
- Stamp sentiment in Evening Evergreen, cut ends of the banner at an angle, and use Dimensionals to attach to card front.
- Die cut the fence and grass. Glue to the card front with Multipurpose Liquid Glue, and thin strips of Dimensionals at the outer edges of the fence.
- Add three Pebbles Enamel Shapes to finish card.
The New Horizons DSP is absolutely stunning!! I have a hunch you might be seeing a lot of it in my future blog posts!
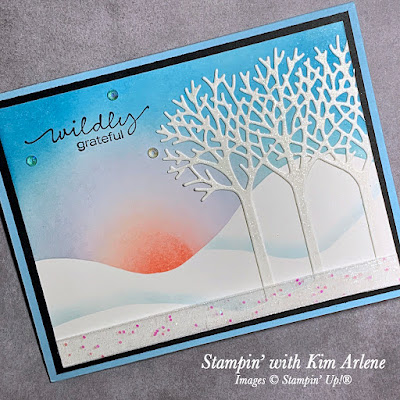
Here is the card I submitted for this month's contest. Thanks again for voting it into second place!
I'd love for you to comment below, if you have a moment. 😊 Then be sure to check out the cards for the Top Ten Winners Hop! You'll see some beautiful projects!!


Love your card! Stunning paper!
ReplyDeleteThanks very much, Melva! the New Horizons DSP is definitely my favourite from the new catalogue!
DeleteI love your card and that dsp!
ReplyDeleteGreetings from Germany
Simone
Thank you Simone!! I love the DSP, too!
DeleteGreat idea with the direction of the mountains and the Shimmer Specialty Paper
ReplyDeleteGreetings from Germany
Liane
Thank you so much, Liane! It seemed to work out okay with the directions for cutting the embossed cardstock, so I went with it! 😊
DeleteWhat a unique way to use the DSP! Congrats on making the Top 10!
ReplyDeleteThank you, Robbie! I have to admit, I wasn't so happy with covering up too much of the gorgeous DSP!
DeleteVery creative Kim! Great card. Congrats on making it to second place in the Top Ten Blog Hop this month!
ReplyDeleteThanks very much, Kylie!! I love to participate in your International Blog Highlights!
DeleteThank you so much, Katja!! Congratulations to you, as well.
ReplyDelete