Monday, January 31, 2022

Amazing Silhouettes Thank You Card

Hello!! Welcome to my blog, and thanks very much for stopping by! It's time for Kylie Bertucci's February International Blog Highlights contest! I hope you like my card, and will vote for mePlease click on the button below to go to Kylie's blog, and vote by clicking on the top right corner of the thumbnail of my card (#30), until you see the heart turn red. Thank you so much for your support!!


I made this card with our new Amazing Silhouettes bundle. This was inspired by a card I saw made by Lisa Freeman. The butterfly silhouette was stamped several times on Shimmery White cardstock to create the top layer. 


The Coastal Cabana layer was embossed with our Painted Texture 3D embossing folder. I love the "thanks" sentiment, which was die cut with the coordinating Amazing Thanks Dies, in Fresh Freesia and Coastal Cabana.


Thanks so much for stopping by--and for voting!!! If you like my card, please click here--then remember to click on the top right corner of the thumbnail of my card (#30) until the heart turns red--that way you know that your vote is registered:


  1. Cut the following layers:
    • Coastal Cabana cardstock: 8-1/2" x 5-1/2"--scored at 4-1/4"; 4" x 5-1/4"--embossed with Painted Texture 3D embossing folder; 3-1/2" x 2"--die cut with "thanks" shadow die
    • Fresh Freesia cardstock: 3-1/4" x 4-1/4"--die cut with largest Stitched So Sweetly die; 3-1/2" x 2"--die cut with "thanks" die
    • Shimmery White cardstock: 2-1/2" x 3-5/8"
    • Basic White cardstock: 4" x 5-1/4"--for inside
  2. Wrap 8" of Fresh Freesia 3/8" Open Weave Ribbon ribbon around a Stampin' Spritzer (or lipstick tube). Tie first knot, and pull parallel to tube; tie second knot (fairly tightly), and pull knot perpendicular to tube. Cut the loop at an angle. Wrap across Painted Texture embossed layer 1/2" from bottom, and adhere to back of embossed layer, using glue dots. Adhere to card base with Stampin' Seal.
  3. With Fresh Freesia ink, stamp butterfly image several times on Shimmery White cardstock, trying not to stamp over butterfly silhouette. Adhere to Fresh Freesia scalloped rectangle with Stampin' Seal, then add to card front with Dimensionals.
  4. Die cut "thanks" and background shadow from Fresh Freesia and Coastal Cabana. Layer them, adhere, then glue to card front.
  5. Add three Iridescent Rhinestones Basic Jewels.
  6. Adhere Basic White cardstock to inside of card.


If you live in Canada and do not have a Stampin' Up! demonstrator, 
I would love to be your demonstrator! Shop here! 😊


Thank you very much for visiting my blog,
and for your support!! 😊


Product List

Monday, January 24, 2022

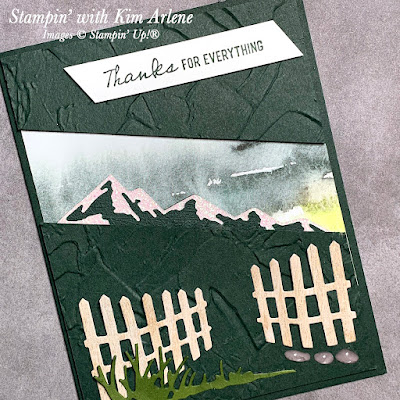
New Horizons Mystery Stamping Thank You Card


Hello, and thanks for stopping by! And thank you so much for voting for my card--it placed second in Kylie Bertucci's January International Blog Highlights competition!! Now I get to participate in Kylie's Top Ten Winners Hop! I am so honoured to be part of a group of tremendously talented designers from all around the world. If you haven't seen my "Top Ten" card, it is posted at the bottom of this blog entry.


Well, this card was a total mystery to me! 😉 I created this during a team Zoom meeting--it was a Mystery Stamping session. We were given measurements of cardstock and Designer Series Paper (DSP) ahead of time, and told to die cut, stamp, or punch 3 to 5 coordinating images. In the meeting we were given directions to emboss, cut, and assemble the card. These sessions are often hilarious, as sometimes we find our listening skills aren't quite as good as we would like them to be (um... guilty!! 🙄), and our cards can look quite different from the others. It's a lot of fun!!


I decided to use my favourite new suite, New Horizons. Besides a stamp set and dies, the suite has the most gorgeous New Horizons watercoloured DSP, a Cotton Ribbon Combo Pack, and Pebbles Enamel Shapes. I am actually quite happy with how my card turned out (even though I had to improvise a bit with the directions to make my diecut elements work for the card)! But this time my "alternative" directions were deliberate. 😂 Honestly!!


  1. Cut the following layers:
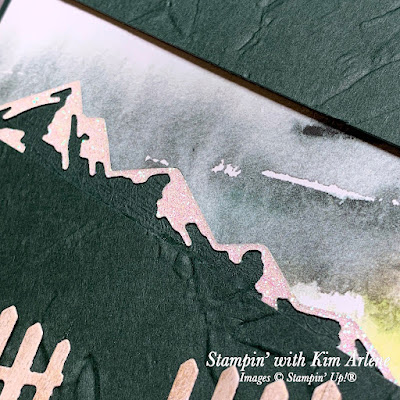
    • Evening Evergreen cardstock: 8-1/2" x 5-1/2", scored at 4-1/4"; 4" x 4" (emboss with Painted Texture 3D embossing folder); 4-1/4" x 1-1/2" (die cut mountains)
    • Old Olive cardstock: 3" x 1-1/2" (die cut grass)
    • Basic White cardstock: 3-1/2" x 1/2" (for sentiment)
    • New Horizons DSP: 4" x 4"
    • Supple Shimmer Specialty Paper (white iridescent): 3-1/2" x 1" (die cut snow)
    • In Good Taste DSP (light woodgrain): 4" x 2" (die cut fence pieces)
  2. Adhere the DSP to the card base, leaving 1/8" margins from the top and sides.
  3. Cut the embossed Evening Evergreen layer at an angle, 1" down from the left side, and 2" down from the right side. Adhere the top part over the DSP with Dimensionals.
  4. Attach the snow over the mountains with Seal or Multipurpose Liquid Glue, then glue to the back of the angled embossed piece. Attach to card front about 1/8" from the bottom and sides, using Dimensionals.
  5. Stamp sentiment in Evening Evergreen, cut ends of the banner at an angle, and use Dimensionals to attach to card front.
  6. Die cut the fence and grass. Glue to the card front with Multipurpose Liquid Glue, and thin strips of Dimensionals at the outer edges of the fence.
  7. Add three Pebbles Enamel Shapes to finish card.

The New Horizons DSP is absolutely stunning!! I have a hunch you might be seeing a lot of it in my future blog posts!

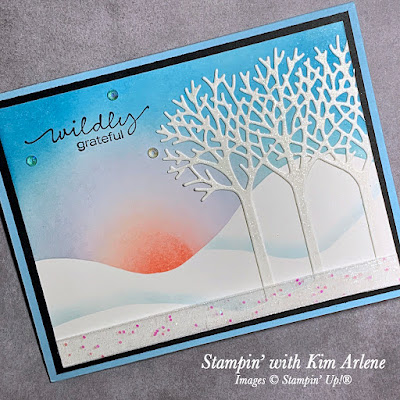
Here is the card I submitted for this month's contest. Thanks again for voting it into second place!


I'd love for you to comment below, if you have a moment. 😊 Then be sure to check out the cards for the Top Ten Winners Hop! You'll see some beautiful projects!!


Product List
Horizon Dies
[157778]
$45.00

Friday, January 14, 2022

West Coast Creators Blog Hop - Friendly Hello Card

Happy New Year!! Welcome to the January West Coast Creators Blog Hop!! This month we are featuring all things Sale-a-Bration!! Did you know that you can get FREE products with every $60 purchase (before taxes and shipping) during our special Stampin' Up® promotion? And, you can earn as many free products as you like! With a $120 purchase, you can choose two free products, etc. There are lots of gorgeous stamp sets and Designer Series Paper (DSP) packages to choose from! We also have a choice of two Level 2 products that you can earn with a $120 order. I used a Level 2 freebie for this card--the Friendly Hello Stamp Set/Designer Series Paper bundle. This is such a cute bundle!!

The DSP does a lot of the work in this card, and makes it a fairly quick card to make. The sentiment was stamped in Basic Gray, then adhered to a label cut with one of our Scalloped Contours Dies.

The bird and flowers are stamped with Memento on Shimmery White cardstock, then coloured with Stampin' Blends and fussy cut.

    1. Cut the following layers: 
      • Basic Gray: 5-1/2" x 8-1/2", scored at 4-1/4"; 3-1/2" x 2-1/4"
      • Floral DSP: 5-1/4" x 4"
      • Basic Black: 2-1/8" x 3-7/8"
      • Small Floral DSP: 2" x 3-3/4"
      • Basic White cardstock: 2-5/8" x 1-3/8"
      • Shimmery White cardstock: 3" x 2-1/2"
    2. Emboss the large piece of floral DSP with the Tasteful Textile embossing folder.
    3. Layer and adhere the smaller DSP over the Basic Black piece; attach to the large floral piece. Wrap a 6-1/2" length of Petal Pink Organdy Striped Ribbon to the back and attach with glue dots or tape.
    4. Stamp sentiment on Basic White in Basic Gray ink. Die cut Basic Gray cardstock with second smallest Scalloped Contours Die; adhere sentiment to label, and add to card front with Stampin' Dimensionals.
    5. Use Memento black ink to stamp the bird and flowers on Shimmery White Cardstock. Colour with Stampin' Blends (Pool Party, Petal Pink, Granny Apple Green, and Soft Suede). Fussy cut, and adhere with Stampin' Dimensionals (at left) and Multipurpose Glue (at right).
    6. Add three Elegant Faceted Gems to finish card.

Here is the Friendly Hello bundle. You can order all of the products using my Host Code to the right--remember that you'll get to choose a free Sale-a-Bration product for every $60 purchase!! And if you spend $120, you can choose the Friendly Hello bundle for FREE, and you can make this card! This promotion ends February 28, 2022--but don't wait! Products are available only while quantities last! 

Thank you so much for stopping by! If you have a moment, please leave a comment below. Then be sure to visit all of the blogs below to see some amazing creations from our talented West Coast Creators!!

You are invited to the Inlinkz link party!

Click here to enter


Product List
Granny Apple Green Stampin' Blends Markers Combo Pack
[147274]
$12.00

Card Keeper Kit Double-Up Online Class!

Lori Willcox and I are very excited to bring you our   CARD KEEPER KIT DOUBLE-UP CLASS!  For a fee of   $59 , you will make a total of   20 ...